

Your home Wi-Fi network is probably less secure than you think, and that is not an opinion. Most people set up their router once, never touch it again, and assume a default password is enough. It is not. Hackers, freeloaders, and data thieves do not need to be sophisticated to get onto an unsecured network. They just need you to be careless. If you want to actually secure your home Wi-Fi and keep unauthorized access out for good, this guide covers every step you need, from the basics to the settings most people never touch.
What Is Home Wi-Fi Security and Why It Matters
Home Wi-Fi security is the practice of protecting your wireless network from unauthorized access, data interception, and device compromise. It goes well beyond setting a password. A truly secure network requires the right encryption protocol, properly configured router settings, and consistent monitoring of what is connected to it.
Most homeowners do not think about network security until something goes wrong. By then, the damage is often already done. Understanding how your network works, and where it is vulnerable, puts you in a position to actually protect it.
True home security works in layers. Your Wi-Fi network is one layer, but a security fence for home adds the physical barrier that digital tools alone cannot provide.
How a Home Wi-Fi Network Works
Your wireless router acts as the central hub between your devices and the internet. It broadcasts a wireless signal that your phone, laptop, smart TV, and IoT devices connect to. That signal does not stop at your front door. It travels through walls and can extend well beyond your home.
Any device within range can technically detect your network. If it is unprotected or poorly secured, connecting to it is not as difficult as most people assume. This is why proper encryption and access controls matter so much.
Risks of an Unsecured Wi-Fi Network
An open or weakly secured network creates serious exposure. Cybercriminals can intercept data passing through your connection, a technique known as packet sniffing. They can also launch man-in-the-middle attacks, positioning themselves between your device and the internet to read or modify your traffic without you ever noticing.
Beyond data theft, a compromised network can be used for illegal activity. If someone uses your connection to commit a crime, including sending spam or launching a DDOS attack, that activity traces back to your IP address. The FTC has documented cases where homeowners faced serious complications because of unsecured network abuse.
Signs Someone May Be Using Your Network
A sudden drop in internet speed without explanation is one of the first signs. You might also notice devices on your network you do not recognize, or your router’s activity lights blinking heavily even when no one at home is actively using the internet.
Tools like Fing, a free network scanning app, let you see every device currently connected to your network with its device name, manufacturer, and IP address. If something unfamiliar shows up, take it seriously. That could be a neighbor using your bandwidth or something worse.
Step 1: Change Your Router’s Default Login Credentials
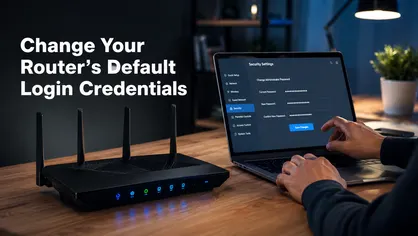
Here is what most people do not realize: every router ships with a default admin username and password, and these defaults are publicly listed online by the manufacturer. Anyone who knows your router brand can look up those credentials in seconds. Leaving them unchanged is essentially leaving your front door unlocked.
Why Default Credentials Are Dangerous
Default credentials are the easiest entry point for attackers. Once inside your router admin panel, someone can change your DNS settings, monitor your traffic, block your devices, or even lock you out completely. This is a brute force attacker’s first stop before anything more sophisticated.
From what we have seen, a large percentage of home routers still run on factory default usernames like “admin” and passwords like “admin” or “password.” It takes under a minute for someone on your network to try those. Do not make it that easy.
How to Access Your Router Admin Panel
Open any browser and type your router’s IP address into the address bar. Most routers use 192.168.1.1 or 192.168.0.1 as the default gateway. If neither works, check the label on the bottom of your router. Brands like TP-Link, Netgear, Asus, and Linksys all print this information directly on the device.
Once inside, look for a section labeled “Administration,” “System,” or “Router Login.” This is where you will find the option to change both the admin username and password. If your router came from an ISP like Verizon or Comcast, the process may be slightly different, but the option will be there.
How to Set a Strong Router Admin Password
Use a password that is at least 12 characters long and combines uppercase letters, lowercase letters, numbers, and symbols. Avoid anything connected to your name, address, or the router brand. NIST guidelines recommend using a passphrase, a random string of four or more unrelated words, which is both memorable and genuinely hard to crack.
Store this password in a secure password manager. You do not access the router admin panel every day, so the risk of forgetting it is real. Losing access to your own admin panel is frustrating and avoidable.
Step 2: Set a Strong Wi-Fi Password
Your Wi-Fi network password is separate from your router admin password, and both matter equally. The Wi-Fi password controls who can connect to your network. The admin password controls who can change your router settings. Treat them as two different locks on two different doors.
What Makes a Wi-Fi Password Strong
A strong Wi-Fi password is long, random, and not based on personal information. Avoid your name, street address, phone number, or anything someone could find on social media. A password like “BlueSky!Mountain77#East” is significantly stronger than “Smith2024” even though both have similar character counts.
Length matters more than complexity. A 16-character password with mixed characters is far harder to crack than an 8-character one, even if the shorter one uses symbols. Password rotation every six months is a reasonable baseline, and you should change it immediately if you suspect your network security has been compromised.
How to Change Your Wi-Fi Password
Log into your router admin panel and look for the wireless settings section. It is usually labeled “Wireless,” “Wi-Fi Settings,” or “WLAN.” From there, find the password or passphrase field and update it to your new, stronger password.
After saving the change, every device on your network will be disconnected and will need to reconnect using the new password. This is actually useful because it forces any unknown or unauthorized devices off the network automatically.
How Often Should You Update It
Most security professionals recommend changing your Wi-Fi password every three to six months as part of regular cyber hygiene. If you have shared your password with guests, neighbors, or service workers, change it sooner. You can also use a guest network, covered in Step 6, to avoid sharing your main password at all.
Step 3: Change Your Network Name (SSID)
Your SSID is the name your Wi-Fi network broadcasts to nearby devices. The default SSID usually includes your router brand and sometimes your ISP name, which tells attackers exactly what hardware you are running before they have even tried to connect.
Why Your Default SSID Is a Security Risk
When your network name says “NETGEAR72” or “TP-Link_5G_3C4A,” it hands attackers a head start. They know your router model, which means they know which known vulnerabilities to look for in the Common Vulnerabilities and Exposures (CVE) database. Changing your SSID removes that advantage immediately.
A unique SSID also helps you identify your own network quickly in crowded areas like apartment buildings, where dozens of networks may be visible at once.
How to Create a Non-Identifiable Network Name
Go to your router’s wireless settings and update the SSID to something that does not identify you, your address, your router brand, or your ISP. Something like “Network5G_Home” or a completely random string works fine. Avoid humor like “FBI Surveillance Van” since it draws attention rather than deflecting it.
Keep the name under 32 characters, which is the maximum allowed by wireless standards. You do not need to be creative, just non-identifiable.
Should You Hide Your SSID Completely
Hiding your SSID means your network does not broadcast its name publicly. Devices that want to connect must already know the name and enter it manually. This adds a minor layer of obscurity, but it is not a true security measure.
Experienced attackers can still detect hidden networks using wireless scanning tools. Hiding your SSID also makes connecting new devices more cumbersome. It is worth doing as one layer of a broader strategy, but do not rely on it alone.
Step 4: Enable the Right Encryption Protocol
Encryption is the backbone of Wi-Fi security. It scrambles the data traveling between your devices and your router so that even if someone intercepts it, they cannot read it. Without the right encryption protocol, your network traffic is essentially readable by anyone with the right tools.
WEP vs WPA vs WPA2 vs WPA3: Which to Use
WEP is the oldest protocol and is completely broken. It can be cracked in minutes using freely available software. WPA was an improvement but has known vulnerabilities. WPA2 is still widely used and is reasonably secure when paired with a strong password. WPA3 is the current standard, certified by the Wi-Fi Alliance, and offers significantly stronger protection including resistance to brute force attacks.
If your router supports WPA3, use it. Most routers made after 2019 do. If you are still running WPA2, it is not an emergency, but upgrading your router should be on your list.
How to Enable WPA2 or WPA3 on Your Router
In your router’s wireless settings, look for a field labeled “Security Mode,” “Encryption,” or “Authentication Type.” Select WPA3 Personal if available. If not, select WPA2 Personal. Avoid any option that includes WEP or says “Open” or “None.”
Routers from brands like Google Nest, Eero, Netgear Orbi, and Ubiquiti UniFi typically have WPA3 enabled by default on newer models. If you have an older TP-Link or Asus router, check the firmware version as some older units support WPA3 after a firmware update.
How to Disable WPS (and Why You Should)
WPS, or Wi-Fi Protected Setup, lets you connect a device to your network by pressing a physical button on the router instead of entering a password. Convenient, yes. Secure, no. WPS has well-documented vulnerabilities that allow attackers to guess the PIN and gain access to your network without ever knowing your password.
Disable WPS in your router admin panel under wireless settings. It is rarely labeled prominently, so look under “Advanced Wireless” or “WPS Settings.” Once it is off, leave it off. The minor convenience it provides is not worth the exposure.
Step 5: Keep Your Router Firmware Updated
Your router runs software just like your phone or laptop, and that software has bugs. Manufacturers discover and patch these vulnerabilities regularly. If you are not updating your firmware, you are running known vulnerabilities that attackers can exploit.
Why Firmware Updates Matter for Security
Firmware updates are how manufacturers close the gaps that get discovered after a product ships. Some of these gaps are minor. Others are critical, affecting encryption, remote access controls, or the router’s ability to handle traffic safely. Staying current is the simplest form of router hardening available to you.
Honestly, this is what drives us crazy about how routers are marketed: manufacturers emphasize speed and range, but rarely make security updates prominent. Most people never update their firmware at all.
How to Check and Update Router Firmware
Log into your router admin panel and navigate to the “Firmware Update,” “Software Update,” or “Router Update” section. Most modern routers will check for and display the latest available version. If an update is available, install it immediately. The process usually takes two to five minutes and requires a router restart.
You can also visit the manufacturer’s website directly. TP-Link, Netgear, Asus, Linksys, and Eero all publish firmware releases on their support pages. Search for your specific model number to find the latest version.
How to Enable Automatic Updates
Many newer routers support automatic firmware updates. In your admin settings, look for an option like “Auto Update,” “Automatic Firmware Updates,” or similar. Enable it. This removes the burden of manual checking and ensures you get critical security patches as soon as they are available.
If your router does not support automatic updates, set a calendar reminder to check manually every three months. It takes five minutes and is well worth the habit.
Step 6: Set Up a Guest Wi-Fi Network
If you share your main Wi-Fi password with visitors, delivery workers, or friends, you are giving them the same level of access as your own devices. A guest network solves this cleanly. It creates a separate, isolated connection that gives visitors internet access without touching your main network.
What a Guest Network Is and How It Protects You
A guest network runs on its own SSID and password, completely separated from your primary network. Devices connected to the guest network cannot see or communicate with devices on your main network. This means a guest’s infected phone cannot spread malware to your laptop or smart devices.
This isolation also applies to IoT devices. Your IP cameras, smart thermostat, and smart speakers are convenient but often have weaker security than computers or phones. For active perimeter coverage beyond fixed cameras, many homeowners are now adding a drone for home security to monitor their property in real time. Keeping them on a separate guest or IoT-dedicated network limits what an attacker can reach if one of those devices gets compromised.
How to Create a Guest Network on Your Router
In your router admin panel, look for “Guest Network,” “Guest Access,” or “Guest Zone” under the wireless settings. Enable it, set a unique SSID, and assign a strong password. Most routers allow you to set bandwidth limits on the guest network as well, preventing visitors from consuming your full connection speed.
Make sure the “Access to Main Network” or “Allow guests to access local network resources” option is turned off. This is the critical setting that enforces the isolation between your guest and primary network.
What Devices Should Be on the Guest Network
Smart home devices are the obvious candidates: IP cameras, smart speakers, smart thermostats, robot vacuums, smart TVs, and gaming consoles. Devices that do not regularly handle sensitive personal data are good candidates for the guest network.
Your primary network should be reserved for devices you actively use for personal or financial tasks: laptops, phones, and tablets. This approach, sometimes called network segmentation, significantly reduces the attack surface of your home network.
Step 7: Disable Remote Router Access
Remote management allows you to log into your router admin panel from outside your home, over the internet. Unless you have a specific and ongoing reason to need this, it should be turned off. It is an open door that serves you rarely and an attacker frequently.
What Remote Management Is
Remote management means your router’s admin panel is accessible from any internet connection, not just your home network. This is useful for IT professionals managing multiple locations, but for the average homeowner it is an unnecessary risk. If an attacker discovers your router’s public IP address and you have remote management enabled, they can attempt to log in from anywhere in the world.
The CISA recommends disabling remote management as a baseline step for home network security. It costs you nothing to turn it off.
How to Turn It Off in Router Settings
Log into your router admin panel and look for “Remote Management,” “Remote Access,” or “WAN Access” under the administration or security settings. The toggle or checkbox should say “Disable” or “Off.” Save the change.
Note that this setting is sometimes enabled by default on ISP-provided routers, particularly from providers like Comcast or Verizon, who may use it for remote diagnostics. If you are concerned about disabling it for technical reasons, contact your ISP to understand the implications before making the change.
Step 8: Position Your Router Strategically
Where you place your router affects more than your signal quality. It also determines how far your wireless signal travels outside your home, and the farther it travels, the more exposure you create.
How Router Placement Affects Signal Leakage
Routers broadcast signals in all directions. A router placed against an exterior wall sends a strong signal outdoors, potentially giving neighbors or people on the street a clean, strong connection to attempt. This increases your exposure to unauthorized access attempts and bandwidth theft.
Apartment dwellers face this more acutely. If your router is next to a shared wall, your neighbors are receiving a strong signal whether you intended it or not.
Best Location for Security and Performance
Place your router near the center of your home. This positions the signal to serve your own space as efficiently as possible while minimizing how much leaks outside. As a practical bonus, central placement usually improves connection quality across your home since the signal does not have to travel as far to reach your devices.
Avoid placing the router on a windowsill or against any exterior wall. Higher placement, like on a shelf rather than the floor, also tends to improve performance and reduce signal leakage through the floor to units below in multi-story homes.
Step 9: Monitor and Manage Connected Devices
Knowing what is on your network is as important as locking it down. New devices appear, old ones get forgotten, and unfamiliar ones sometimes show up without a clear explanation. Regular auditing keeps you in control.
How to See All Devices on Your Network
Your router admin panel has a connected devices section, usually labeled “Device List,” “DHCP Clients,” or “Connected Devices.” It shows the device name, MAC address, and IP address of everything currently on your network. Review this list regularly.
For a more detailed view, tools like Fing or GlassWire go further. They identify device manufacturers, flag new connections, and alert you to suspicious activity in real time. GlassWire in particular offers network monitoring with visual bandwidth tracking, which makes it easy to spot unusual usage patterns.
How to Disconnect and Block Unknown Devices
If you see a device you do not recognize, disconnect it from the admin panel immediately. Then change your Wi-Fi password. This forces every device to reconnect using the new password, and any unauthorized device will be locked out.
You can also add unfamiliar devices to a blocklist directly in your router settings. This prevents them from reconnecting even if they know the network password. Look for “Block Device,” “Access Control,” or “Blocklist” in your router’s advanced settings.
How to Use MAC Address Filtering
Every network device has a unique MAC address, a hardware identifier assigned at manufacture. MAC address filtering lets you create a whitelist of approved devices. Only devices whose MAC addresses are on your approved list can connect, regardless of whether they know the password.
This is a useful additional layer but not foolproof. Experienced attackers can spoof MAC addresses. Still, it raises the effort required to gain unauthorized access, which is always the goal. Set it up through the “Access Control” or “MAC Filtering” section in your router admin panel.
Step 10: Use a VPN on Your Home Network
A VPN, or virtual private network, encrypts your internet traffic and hides your IP address from outside observers. Most people associate VPNs with public Wi-Fi, but they add a meaningful layer of privacy and security at home too.
What a VPN Does for Home Network Security
When you use a VPN, your internet traffic is routed through an encrypted tunnel before reaching its destination. This protects against eavesdropping, data interception, and certain types of man-in-the-middle attacks. It also prevents your ISP from monitoring your browsing activity.
It is worth being clear: a VPN does not replace router-level security. It is an additional layer. You still need strong passwords, proper encryption, and firmware updates regardless of whether you use a VPN.
Router-Level VPN vs Device-Level VPN
A device-level VPN, like NordVPN or ExpressVPN installed on your laptop or phone, protects only that one device. A router-level VPN covers every device on your network simultaneously, including smart home devices that cannot run their own VPN client.
Setting up a VPN directly on your router is more technically involved. Routers from brands like Asus and some Netgear models support this natively. Others may require a third-party firmware. If the technical setup feels beyond your comfort level, starting with a device-level VPN on your primary devices is a practical first step.
Best Practices for VPN Use at Home
Choose a reputable provider with a clear no-logs policy. Free VPNs often monetize your data, which defeats the purpose entirely. Paid services like NordVPN and ExpressVPN have been independently audited and are generally reliable options.
Enable the VPN kill switch feature if your provider offers it. This automatically cuts your internet connection if the VPN drops, preventing your real IP address from being exposed. It is a small setting that adds meaningful protection.
Step 11: Enable Your Router’s Built-In Firewall
Most routers include a built-in firewall, but it is not always enabled by default. A firewall acts as a filter between your home network and the internet, blocking unauthorized inbound connections and flagging suspicious outbound traffic.
What a Router Firewall Does
The firewall examines incoming and outgoing data packets and compares them against a set of rules. Traffic that does not meet those rules gets blocked. This is your first line of defense against network intrusion attempts, malware trying to phone home, and rogue access point connections.
Unlike the software firewall on your individual computer, a router firewall protects every device on your network simultaneously, including devices like smart speakers and IP cameras that have no firewall of their own.
How to Enable and Configure It
Log into your router admin panel and look for “Firewall,” “Security,” or “Network Protection” in the settings. Toggle it on if it is not already enabled. Most consumer routers do not require additional configuration beyond enabling the feature.
More advanced routers, particularly from Ubiquiti or UniFi, offer granular firewall rule configuration. If you have one of these, investing time in learning the firewall rules is worthwhile. For most home users though, simply ensuring the built-in firewall is active is sufficient.
Advanced Security Settings Worth Enabling
Once you have covered the core steps, a few additional settings can meaningfully improve your network’s resilience. These are not complicated, but they require you to spend a few extra minutes in your router admin panel.
How to Disable UPnP on Your Router
UPnP, or Universal Plug and Play, allows devices on your network to automatically open ports and configure router settings without your knowledge or approval. This was designed for convenience, but it has been repeatedly exploited by malware. Several high-profile DDOS attacks have used UPnP vulnerabilities to recruit home routers into botnets.
Disable UPnP in your router admin settings under “Advanced” or “Network Settings.” The option is usually a simple on/off toggle. After disabling it, most smart home devices will continue to function normally. The feature is largely unnecessary for typical home use.
How to Set Up a Separate IoT Device Network
Beyond using a guest network for IoT devices, some routers support VLAN segmentation, which allows you to create fully isolated network segments with their own traffic rules. This is the most robust form of IoT network isolation available for home use.
Even without VLAN support, simply putting all smart devices on your guest network achieves a meaningful level of separation. The goal is ensuring that a compromised smart thermostat or IP camera cannot be used as a stepping stone to reach your laptop or phone. Network segmentation is how enterprise networks handle this problem, and the same principle scales down to home use effectively.
DNS Security: Switching to a Secure DNS Resolver
Your DNS resolver is the service that translates web addresses into IP addresses. By default, you use your ISP’s DNS servers, which may not be optimized for privacy or security. Switching to a secure DNS resolver adds protection against phishing, malware-hosting domains, and certain types of data interception.
Cloudflare’s DNS (1.1.1.1) and OpenDNS are both well-regarded options. Cloudflare supports DNS over HTTPS (DoH), which encrypts your DNS queries so they cannot be read by third parties. You can configure your DNS resolver in your router’s network settings under “DNS” or “Internet Settings.” Setting it at the router level applies it to every device on your network automatically.
How to Secure Your Wi-Fi on Windows
If you are using Windows and connecting to networks outside your home, a few device-level settings add meaningful protection. These work alongside your router-level security, not instead of it.
How to Change Security Type and Network Key in Windows Settings
On Windows 10 and 11, go to Settings, then Network and Internet, then Wi-Fi. Click “Manage known networks,” select your network, and click “Properties.” From here you can view and update your security type. Ensure it is set to WPA2 or WPA3.
You can also disable file and printer sharing for networks you do not fully trust. Go to Network and Sharing Center, click “Change advanced sharing settings,” and turn off file and printer sharing for public networks. Disabling Remote Desktop unless you actively use it is also a smart step for Windows users, as it removes a common attack vector that requires no router-level vulnerability to exploit.
What to Do If Your Wi-Fi Has Already Been Compromised
If you suspect your network has been breached, speed matters. Every minute of delay gives an attacker more time to establish persistence, change your settings, or harvest data from connected devices.
How to Perform a Router Factory Reset
A factory reset wipes your router back to its original default settings, removing any changes an attacker may have made. Find the physical reset button on your router, usually a small pinhole on the back or bottom. Hold it for ten seconds until the indicator lights change.
After the reset, you will need to reconfigure everything from scratch: your SSID, passwords, encryption settings, guest network, and all the other steps in this guide. Yes, that takes time. But it is the only way to be certain you have removed any unauthorized changes to your configuration.
Steps to Take After a Security Breach
Change every password that was associated with the network immediately, including your Wi-Fi password, router admin password, and any accounts you accessed while connected. Check Have I Been Pwned to see if your email or credentials appear in known data breaches.
Audit every device that was on the network during the breach. Look for unfamiliar apps, unusual outbound traffic, or settings changes you did not make. Run a full security scan on all computers that were connected. Contact your ISP to report the breach and ask if there is anything on their side that needs to be addressed, particularly if your public IP address was involved in suspicious activity.
FAQ’s
Can My Neighbor Steal My Wi-Fi Without Me Knowing?
Yes, and it happens more than most people realize. If your network is unprotected or uses a weak password, a neighbor can connect without your awareness. The most obvious symptom is slower internet speeds, but the only way to know for certain is to check your connected devices list in your router admin panel or use a tool like Fing to scan your network.
Is WPA3 Worth Upgrading To?
If your current router does not support WPA3, upgrading is worth considering, especially if it is more than five years old. WPA3 offers stronger encryption and significantly better resistance to brute force attacks than WPA2. Routers from Eero, Google Nest, Netgear Orbi, and other modern brands support WPA3 as standard. The upgrade cost is typically between $80 and $300 depending on the model and your home size.
Does Hiding My SSID Make My Network More Secure?
Only marginally. Hiding your SSID prevents casual discovery but does not stop anyone using wireless scanning software. It is worth doing as one element of a broader strategy, but it should not be your primary defense. Combine it with strong encryption and a good password for any meaningful benefit.
How Many Devices on My Network Is Too Many?
There is no universal limit, but more devices means more potential vulnerabilities. Each connected device is a potential entry point. The important thing is knowing what every device is and ensuring each one is updated and properly secured. If you have many IoT devices, use network segmentation to isolate them. Quality routers from Asus, Netgear, or Eero typically handle 30 to 50 simultaneous connections without performance issues.
Do I Need a VPN If I Already Have a Secure Router?
They serve different purposes. A secure router controls access to your network. A VPN encrypts your internet traffic and masks your IP address from the websites and services you use. A well-secured router without a VPN still exposes your browsing activity to your ISP. Using both gives you stronger all-round protection, but a VPN alone will not compensate for poor router security.
How Do I Know If My Router Has Been Hacked?
Common signs include settings changes you did not make, unfamiliar devices on your network, being locked out of your admin panel, and unexplained slowdowns. Your DNS settings changing without your knowledge is a particularly telling sign, as attackers often reroute DNS to intercept traffic. If you suspect a breach, perform a factory reset immediately and reconfigure your router from scratch following the steps in this guide.